
Here's a little about me...
I have been a dedicated maker all my life. I spent a quiet childhood and all the years since, cutting, gluing, stitching, sawing, soldering, and cooking things up.
For the past 20 years, I have been working primarily in clay as a studio potter and tile maker and teaching ceramics. I have sold and exhibited my work through fine craft galleries and exhibitions as well as retail shows, and also specialize in custom tile. I started working out of an old peanut factory building here in Somerville, MA, and then for 10 years I had my studio in a storefront space, next to my friend and jeweler, Jade Moran.
With a house and two small children, I recently moved my ceramic studio home. I have always worked on design and development of garden products for my family business, Achla Designs, and am now pursuing more product design for housewares, home decor and textiles. This past year I was asked to develop some patterns for interior design so I've been trying out some of my designs on fabric with Spoonflower. I continue to make ceramic work which I sell through a handful of galleries and my Etsy store and teach at Mudflat Studio.
About my work...
I love to work in series, creating a body of work with images that come from a theme, or recurring preoccupation I have. Most of my work is made from white stoneware and porcelain clay using a variety of forming techniques, including wheel-throwing, slab-building and slip-casting. Strong clean forms, with soft corners and planes are great for experimentation with line-drawing, texture and color. The surface is created by incising and carving, and brushing, stenciling, and trailing slip. The glaze and underglaze materials vary the line quality and colors. By applying the glazes to selected areas with a brush, some areas can be shiny, while others remain softly matte.

My Process for making a tile:

A plug of white stoneware clay is cut to conform to the size and shape of the plaster mold. This plug is much thicker than the final tile will be. The extra clay protects the edges of the plaster as the clay is pounded into the mold with a rubber mallet.

The excess clay is sliced off with a wire tool, and the back of the tile is scraped and smoothed flat. A beveled piece of wood is pressed in to create an indentation for hanging. The tile is also stamped with the maker's mark.
The tile will dry for several hours. As the plaster draws moisture from the clay, the tile begins to shrink away from the mold. The mold can then be inverted onto a board, the tile will drop out, and the mold removed.
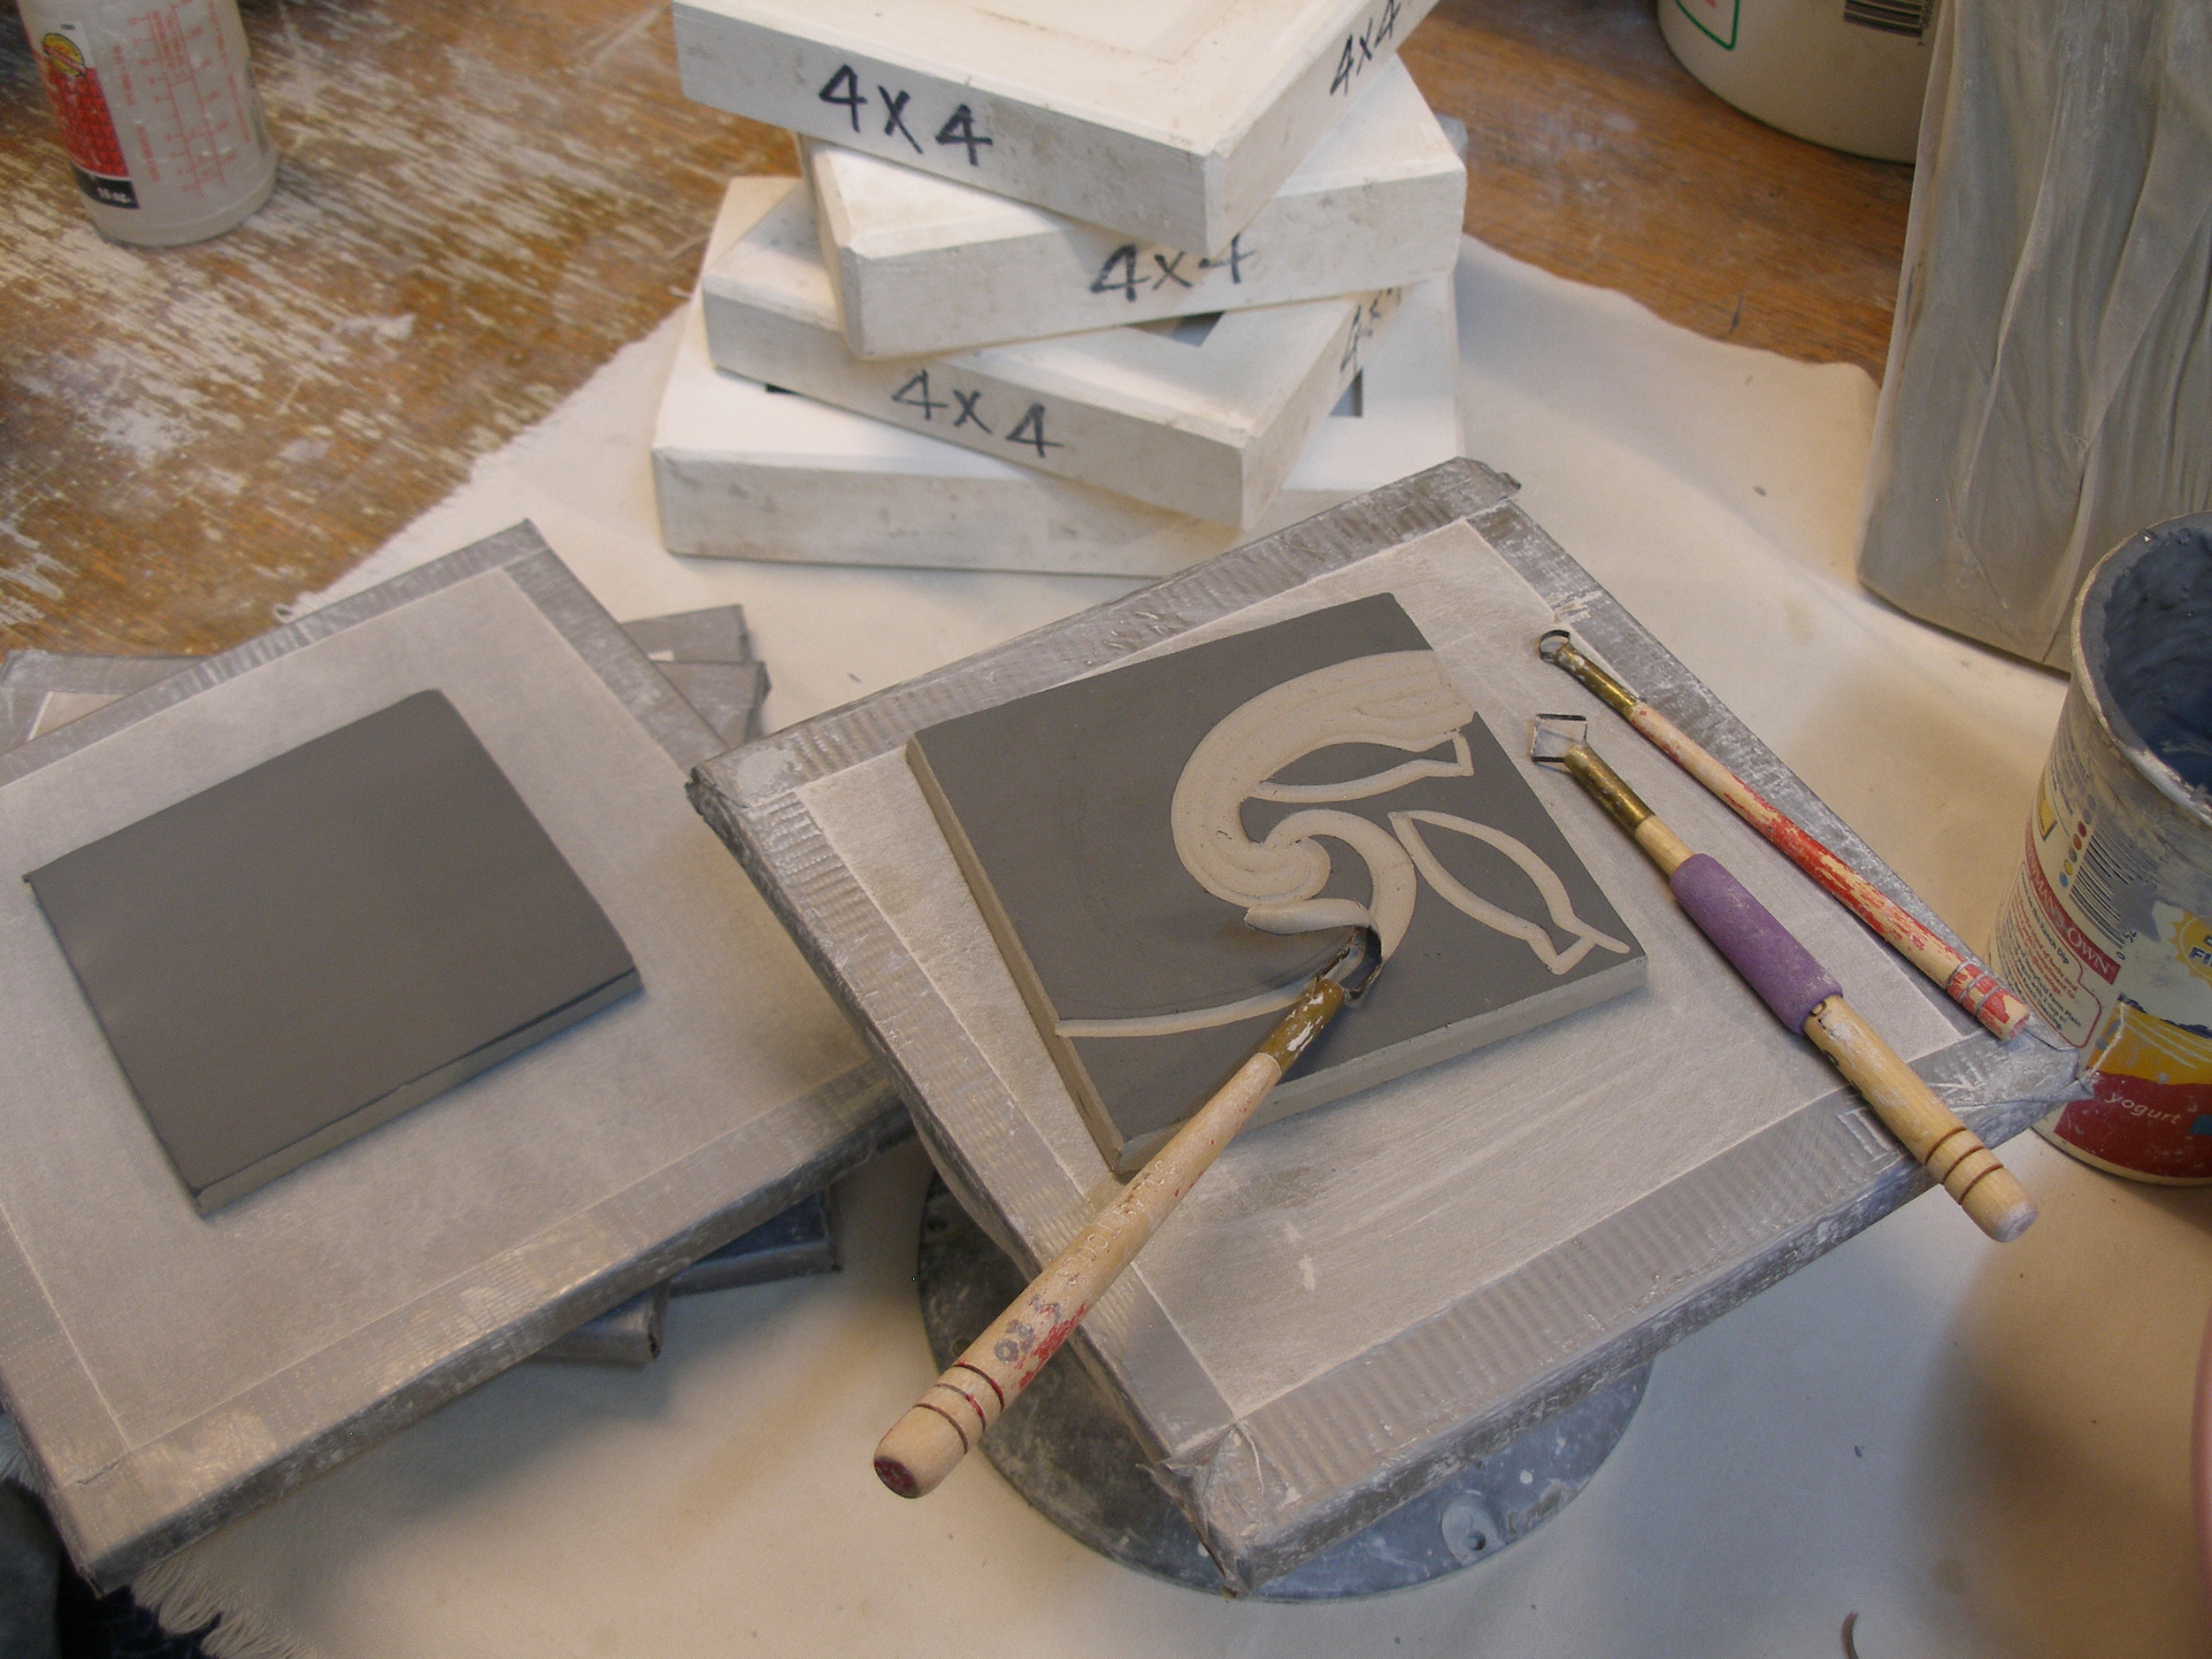
The blank tile is brushed with a layer of black colored clay, or slip, and once the slip has dried, stacked between boards to firm up overnight. When the tile has reached the leather-hard stage, still pliable, but easily retaining it's shape, it is ready to carve. The design is done free-hand, using a variety of looped cutting tools to remove the background, leaving the design.
The carved tile is then stacked again between boards and left to dry for at least a week before it is dry enough for the bisque firing.

The bisque-fired tile (at left) shows the finished carved image. The light areas are the white-colored clay revealed by carving away the black slip, which now looks grey. The tile is then brushed with various colored glazes (at right) and fired again, for about 11 hours, to 2200°F. The glazes used will give a different effect over the black and white areas.

A finished tile.